We teach the kids about electrical circuits, batteries, motors, resistance, voltage, amperage, and power.
Then they each build a lamp.
They decorate, wire,and test it.
And take it home for their use or for a Christmas present for their mom, grandma or whomever they choose.
One of the first things we teach is that a circuit is a circle that electrons can move around.
The circle has to be made of a conductor like copper or aluminum but any metal will suffice.
As will water, carbon, people and some other things.
For the electrons to move requires something to be pushing them, like a generator or battery.
Here the kids have each become an atom of their favorite metal. Gold was a popular choice.
They each have a loosely held electron (marble).
They can only have one of these at a time.
So when the battery (me) tries to push another electron to the atom on my left in the circuit
that atom has to pass their electron to the next atom and so on.
Eventually the atom on my right has to give me/battery their electron.
We assign the job of being a motor to one of the kids and they have to spin around when an electron passes through them.
Someone else gets the job of being a switch the won't let any electrons pass if it is off/open but will if it is on/closed.

Once they seem to have the idea of a circuit we introduce them to a multimeter.
Here two girls are verifying the meter shows zero resistance when the probes are touched together.

The resistance is very high when there isn't a complete circuit.


But electrons can flow from the red probe through one kid and into the other via the firm grip on his arm and then to the black probe, the circuit is complete.
Their series resistance can be read on the meter.
It seems to be surprising to the fellow on the left and pleasing to the one on the right.

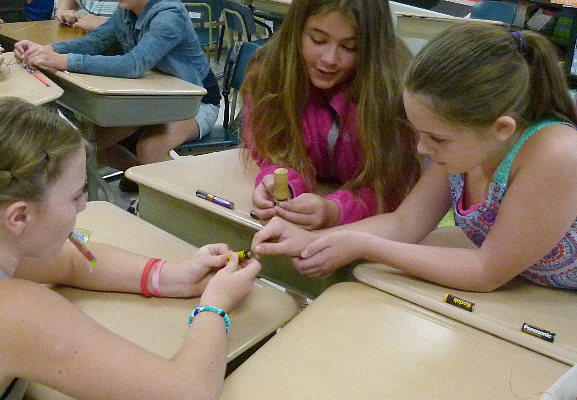
The girl in pink is holding a motor while the others are connecting it to a battery.
One battery it spins, two means a higher voltage so it spins faster.
Reverse the connections to the battery and it goes the other direction.


The kids got to paint the pots that would be the base of their lamps.
Nancy encouraged them to be creative.
If they planned to give the lamp to to someone as a present, make it suit the recipient.


A couple close up.


We explained that the components they were using had been certified by the Underwriters Laboratory as safe if connected properly.
They searched for this symbol on the socket, it's case and the wire. It appeared 6 times in various places

They also discovered that the wire was rated for 103 degrees C and 300 volts.
They need a stress relief where the wire goes into the socket to be sure that it isn't pulled loose by an accidental tug.
One acceptable way to provide that is an underwriters knot.
These diagrams show how to tie it in the wire.
The knot is just inside the base of the socket and prevents a pull on the cord dislodging the electrical connections.


